Explore Free Woodwork Projects for Personalized Creations

Unlocking Creative Potential: A Comprehensive Guide to Free Woodwork Projects for Personalized Creations

The allure of woodworking lies not only in the creation of functional objects but also in the opportunity for personalized expression. Transforming raw lumber into unique, handcrafted items offers a deeply satisfying experience, fostering creativity and providing tangible results. This comprehensive guide explores a diverse range of free woodworking projects, offering inspiration for both novice and experienced artisans, with a focus on personalization and customization.

Beginner-Friendly Projects: Mastering the Fundamentals

For those new to woodworking, starting with simpler projects builds confidence and fundamental skills. These initial endeavors lay the groundwork for more ambitious creations later on.

Simple Shelves: Tailored to Your Space

Constructing shelves is a quintessential beginner project. The beauty lies in the adaptability: shelves can be customized to fit any space, from a small bathroom to a large living room. Personalization can be achieved through the choice of wood (pine, oak, or even reclaimed wood), stain or paint color, and the addition of decorative elements such as molding or metal brackets. Free plans are readily available online, guiding you through each step of the process, from cutting the wood to attaching the brackets. The dimensions can be easily adjusted to perfectly fit the intended location, making these shelves a truly personalized piece.

Coasters: A Perfect Introduction to Finishing Techniques

Creating a set of coasters offers a fantastic opportunity to experiment with different finishing techniques. Personalization can be infused through the choice of wood species – the rich grain of cherry contrasting beautifully with the lighter tones of maple. You can also incorporate personalized engravings or burnings, adding initials, dates, or simple designs. Beyond the aesthetic appeal, mastering the application of finishes like varnish or oil is a crucial skill for any woodworker. Numerous free online tutorials offer detailed instructions, making this project both accessible and educational.

Picture Frames: Showcasing Cherished Memories

Picture frames are another excellent entry-point project, allowing for a high degree of personalization. The size and shape of the frame can be adjusted to accommodate specific photographs or artwork. Different wood types and finishes can complement the style of the image. Adding decorative elements like intricate carvings or inlay work elevates the frame from a simple holder to a bespoke piece, reflecting the unique character of the photograph it showcases. Free plans and templates are readily available online, simplifying the construction process.

Intermediate Projects: Expanding Your Skillset

Once comfortable with basic techniques, intermediate projects challenge you to refine your skills and explore more complex designs. These projects require greater precision and attention to detail.

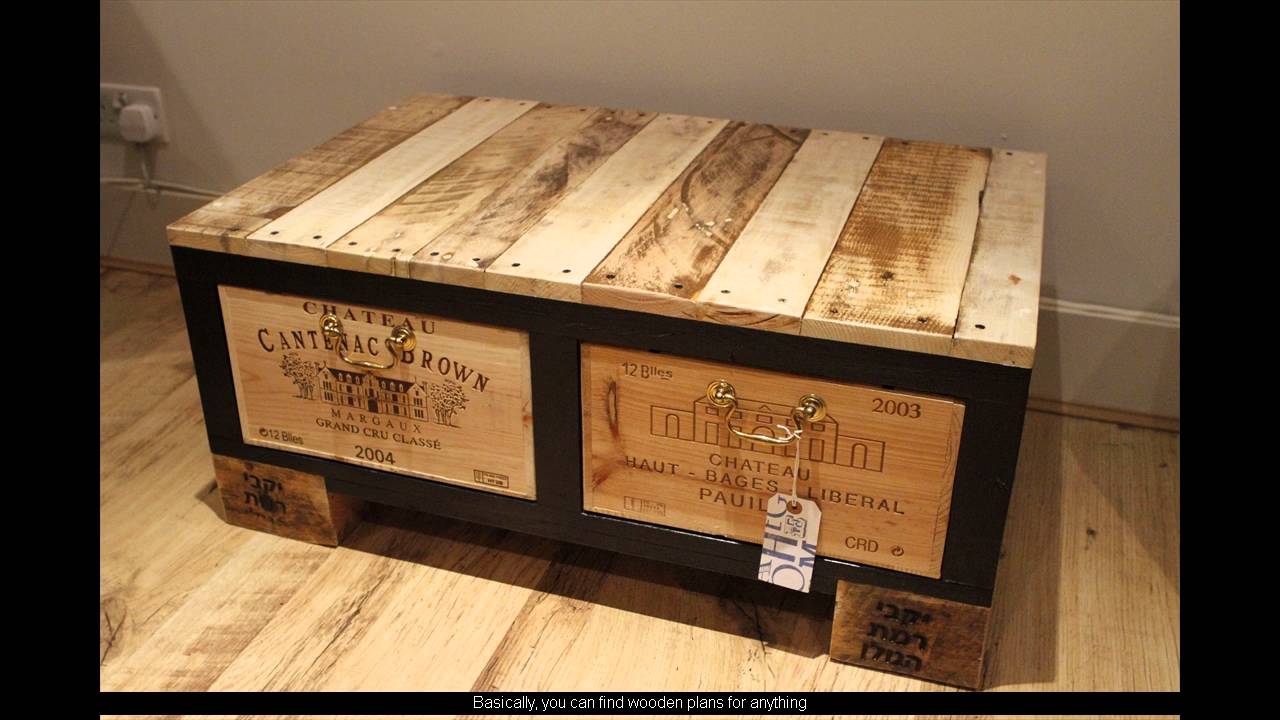
Small Wooden Boxes: A Treasure Trove of Possibilities

Constructing wooden boxes provides an excellent opportunity to practice joinery techniques like miter joints or dovetail joints. The size and shape of the box can be easily customized. Personalization can be taken to the next level through the incorporation of intricate hinges, latches, or decorative inlays. The choice of wood and finish can reflect the intended use of the box, whether it is a jewelry box, a keepsake container, or a storage solution for small items. Many free plans are accessible online, offering various levels of complexity.

Cutting Boards: A Functional and Stylish Addition to the Kitchen

Crafting cutting boards combines functionality with aesthetic appeal. The size and shape can be adapted to fit individual kitchen needs. Different wood types offer varying levels of hardness and durability, each suited to different cutting tasks. Personalization is achieved through the incorporation of handles, different edge profiles, or the choice of a unique wood grain pattern. Free plans often include detailed instructions on selecting appropriate wood and applying food-safe finishes. This project allows for creativity while providing a practical, everyday item.

Wall-Mounted Key Holders: A Practical and Personalized Entryway Feature

A wall-mounted key holder is a simple yet highly functional project. The design can be easily adapted to suit the style of the home. Personalization is achieved through the choice of wood, the shape of the key holder, and the addition of decorative features such as hooks or a small shelf. Free plans provide guidance on creating a secure mounting system that integrates seamlessly into the wall. This practical project provides an opportunity to improve both your woodworking and organizational skills.

Advanced Projects: Embracing Complexity and Creativity

Advanced projects demand significant skill and experience, allowing for maximum creative freedom and personalization.

Custom-Designed Coffee Table: A Statement Piece for the Living Room

Designing and building a custom coffee table is an ambitious undertaking, requiring precision and a solid understanding of woodworking techniques. The level of personalization is unparalleled, with freedom to select the dimensions, shape, and style to perfectly complement the living room's décor. The choice of wood, the type of joinery used, and the finish all contribute to the table's unique character. While finding complete free plans for such a project may be challenging, numerous resources offer guidance on specific techniques and design elements, empowering you to create a truly bespoke piece.

Handcrafted Rocking Chair: A Timeless Classic Reimagined

Constructing a rocking chair presents an advanced woodworking challenge, demanding mastery of various techniques. The design of a rocking chair can be significantly personalized to reflect individual preferences. Customization includes altering the dimensions to fit the user's height and weight, choosing different wood types to achieve a desired aesthetic, and adding decorative elements like carvings or inlay. Finding complete free plans for a rocking chair may prove difficult, but numerous resources offer detailed instructions on specific aspects of the construction, allowing for creative adaptation and personalization.

Unique Garden Furniture: Transforming Outdoor Spaces

Crafting garden furniture, such as benches, tables, or chairs, offers an excellent opportunity to combine practicality with artistic expression. The design can be adapted to fit the specific dimensions and style of the garden, making each piece unique. Personalization can extend to the choice of wood, the integration of decorative elements like carvings or mosaics, and the application of weather-resistant finishes. While complete free plans may be scarce, numerous resources offer guidance on individual techniques and design considerations, enabling the creation of bespoke outdoor furniture.

Ultimately, the world of free woodworking projects is vast and varied. The key to unlocking your creative potential lies in exploring various designs, mastering fundamental techniques, and embracing the opportunity for personalized expression. From simple shelves to complex garden furniture, each project offers a rewarding journey, transforming raw materials into unique and cherished creations.

Share:

Glass Top Coffee Table Build – Free DIY Guide

Glass Top Coffee Table Build – A Comprehensive DIY Guide

Constructing a glass-top coffee table presents a rewarding DIY project, allowing for personalized design and significant cost savings compared to purchasing a pre-made piece. This guide provides a detailed, step-by-step approach to building a sturdy and aesthetically pleasing coffee table, emphasizing precision and safety throughout the process. Successful completion requires careful planning, accurate measurements, and adherence to safe woodworking practices.

Phase 1: Planning and Material Acquisition

Before initiating construction, meticulous planning is crucial. This phase involves determining the table's dimensions, selecting appropriate materials, and acquiring all necessary tools and safety equipment.

1.1 Defining Dimensions and Design

The first step involves determining the desired dimensions of your coffee table. Consider the available space in your living room and the intended functionality. Measure the area carefully to ensure the table's footprint is proportionate to the room. Sketch a design, noting the length, width, and height. Decide on the desired style – modern, rustic, minimalist – as this will influence material choices and the overall aesthetic.

1.2 Material Selection

Wood Selection: The choice of wood significantly impacts the table's durability and aesthetic appeal. Hardwoods such as oak, maple, or walnut offer superior strength and longevity but come at a higher price point. Softer woods like pine or fir are more affordable but may require more careful handling during construction. Consider the wood's grain pattern and overall color when selecting your lumber.

Glass Selection: Tempered glass is essential for safety reasons. Its superior strength minimizes the risk of shattering under normal use. Determine the thickness of the glass based on the table's dimensions; larger tables require thicker glass for enhanced stability. Consider the edge finishing – beveled, polished, or otherwise – to complement the overall design.

Hardware Selection: Choose high-quality screws, wood glue, and any other necessary fasteners. Consider using concealed fasteners to maintain a clean, uncluttered appearance. Select appropriate wood filler to seamlessly fill any gaps or imperfections in the wood.

1.3 Tool Acquisition and Safety Precautions

Ensure you have the necessary tools before commencing construction. This includes:

  • Measuring tape
  • Wood saw (circular saw or miter saw recommended)
  • Drill with various drill bits
  • Screwdriver (both Phillips and flathead)
  • Sandpaper (various grits)
  • Wood glue
  • Clamps
  • Safety glasses
  • Dust mask
  • Ear protection
  • Work gloves

Safety is paramount. Always wear appropriate safety gear, including safety glasses, a dust mask, and ear protection. Work in a well-ventilated area to minimize exposure to sawdust and fumes.

Phase 2: Frame Construction

This phase focuses on constructing the sturdy frame that will support the glass top. Accurate measurements and precise cuts are essential for a stable and visually appealing table.

2.1 Cutting and Assembling the Frame

Based on your pre-determined dimensions, cut the lumber for the frame to the required lengths. Ensure all cuts are square and accurate to avoid instability. Use a miter saw for precise 90-degree cuts. Apply wood glue to the joints and secure them using wood screws. Pre-drill pilot holes to prevent wood splitting. Use clamps to firmly hold the joints together while the glue dries completely.

2.2 Sanding and Finishing

Once the glue is dry, carefully sand all surfaces of the frame to a smooth finish. Start with coarser grit sandpaper and gradually progress to finer grits. This will ensure a smooth surface for applying a stain or sealant. Apply a wood stain or sealant according to the manufacturer's instructions. Allow sufficient drying time before proceeding to the next stage.

Phase 3: Glass Top Installation

This phase involves carefully securing the tempered glass top to the completed frame. Handle the glass with extreme care to prevent breakage or injury.

3.1 Glass Handling and Preparation

Tempered glass is exceptionally strong, but it's crucial to handle it with care. Wear gloves to prevent fingerprints and use suction cups or other lifting aids to move the glass safely. Inspect the glass for any chips or cracks before installation.

3.2 Securely Attaching the Glass

There are several methods to secure the glass to the frame. One common method involves using specialized glass clips designed for this purpose. These clips are attached to the frame and securely hold the glass in place. Ensure the clips are evenly spaced around the perimeter of the frame to distribute the weight evenly. Another method is using a continuous bead of silicone sealant around the perimeter of the frame, which helps to securely hold the glass in place and provide a clean finished look. Allow the sealant to cure fully before using the table.

Phase 4: Final Touches and Quality Check

This final phase involves inspecting the completed coffee table for any imperfections and applying any necessary final touches.

4.1 Inspection and Adjustments

Carefully inspect the finished table for any loose screws, uneven surfaces, or other imperfections. Tighten any loose screws and sand down any rough edges. Ensure the glass top is securely fastened and sits level on the frame.

4.2 Cleaning and Protection

Clean the entire table thoroughly to remove any sawdust, glue residue, or fingerprints. Apply a protective coating to the wood frame, if desired, to enhance its durability and resistance to scratches and stains. This could include a clear coat of polyurethane or a similar protective sealant.

Building a glass-top coffee table is a fulfilling project that combines craftsmanship and design. By carefully following these steps and prioritizing safety, you can create a beautiful and functional piece of furniture for your home, a testament to your DIY skills and a unique addition to your living space.

Share:

Building a Wooden Ukulele: Techniques for the Perfect Sound

Building a Wooden Ukulele: Techniques for the Perfect Sound

Hey there, fellow ukulele enthusiasts! So you're thinking about building your own ukulele? That's awesome! It's a super rewarding project, and the sound of a ukulele you've crafted yourself is just something else. But let's be honest, getting that *perfect* sound isn't just about slapping some wood together. It takes careful planning, precision, and a dash of ukulele magic. This guide will walk you through some key techniques to help you build a ukulele that sounds amazing.

Choosing Your Wood: The Foundation of Sound

The wood you choose is paramount. Different woods have different tonal characteristics, impacting everything from brightness and projection to warmth and sustain. Think of it like choosing the right paint for a masterpiece â€" the wrong color and the whole thing falls flat.

Top Wood (Soundboard):

This is arguably the most crucial piece. Popular choices include:

  • Sitka Spruce: A classic, known for its bright, responsive sound and good projection. A great all-around choice for beginners and experts alike.
  • Engelmann Spruce: Softer than Sitka, offering a warmer, more mellow tone. Excellent for fingerstyle playing.
  • Mahogany: Provides a rich, warm tone with good sustain. A bit less bright than spruce, but beautiful nonetheless.

Remember, even within a species, there’s variation. Look for wood with straight, even grain for optimal sound.

Back and Sides Wood:

These contribute to the overall resonance and tonal balance. Popular options include:

  • Mahogany: A versatile choice, offering warmth and balance.
  • Koa: Known for its stunning beauty and rich, complex tone. It's a pricier option, but the sound is often considered worth it.
  • Sapele: A more affordable alternative to mahogany, offering a similar warm tone.

Crafting the Body: Precision is Key

Once you've got your wood selected, it's time to get down to the nitty-gritty. Accuracy is crucial here; any imperfections can negatively affect the sound and playability. This stage involves:

Creating the Templates:

This is where you'll create your patterns for the ukulele's body parts. Accurate templates are absolutely essential. Consider using CAD software or carefully drawn templates on sturdy material.

Cutting and Shaping the Wood:

Use the right tools for the job. A bandsaw or jigsaw is great for rough-cutting, followed by hand tools like spokeshaves and sanding blocks for fine shaping and smoothing. Take your time â€" rushing this step leads to errors.

Joint Accuracy:

The accuracy of your joints â€" especially where the body parts meet â€" dramatically impacts the sound. Tight, well-fitting joints prevent unwanted vibrations and improve resonance. Consider using traditional woodworking joints like dovetail or mortise and tenon joints for superior strength and sound.

The Neck and Fretboard: Playability Meets Tone

The neck and fretboard are just as crucial as the body. A poorly made neck will make the ukulele unplayable, regardless of how great the body sounds.

Neck Wood Selection:

Mahogany and Maple are popular choices for their stability and strength. They offer different tonal characteristics â€" mahogany is warmer, while maple is brighter.

Fretting the Neck:

This involves precisely placing the frets onto the fretboard. Evenly spaced frets are vital for accurate intonation. Use a fretting jig to ensure perfect placement and a sharp chisel or fretting tool for clean cuts.

Nut and Saddle:

These small but important components impact the ukulele's intonation and playability. The nut and saddle should be made from materials like bone or Graph Tech Tusq, known for their excellent vibrational transfer properties.

Bracing: The Heart of Resonance

Bracing is the internal structure that supports the soundboard and greatly influences the ukulele's resonance and tone. The type, size, and placement of braces are crucial.

Traditional vs. Non-Traditional Bracing:

Traditional bracing patterns are tried and true, but experimentation with different bracing patterns can yield unique and interesting tonal results. Research different patterns and consider what sounds best for your design.

Glue Selection:

Use a high-quality wood glue specifically designed for musical instruments. This glue needs to be strong yet flexible enough to accommodate the vibrations of the instrument without compromising the integrity of the joints.

Finishing Touches: Protecting Your Masterpiece

A proper finish protects the wood, enhances the appearance, and can subtly influence the tone. Many layers of thin coats are better than a few thick coats.

Sanding:

Meticulous sanding is crucial for a smooth, even finish. Start with coarser grit sandpaper and gradually move to finer grits for a silky-smooth surface.

Finishing:

Several finishes are available, including lacquer, shellac, and polyurethane. Each offers different properties in terms of durability and tonal impact. Experiment to find what you like best.

Setting Up Your Ukulele: The Final Polish

Even after building your ukulele, there's still some work to be done. This is where you fine-tune the playability and ensure it plays optimally.

  • Intonation: Check and adjust the intonation to ensure that the ukulele plays in tune across the fretboard.
  • Action (String Height): Adjust the string height (action) for optimal playability. Too high, and it's difficult to play; too low, and the strings buzz.
  • String Choice: Different strings offer different tonal qualities. Experiment to find your perfect match.

Commonly Asked Questions

Q: What tools do I need to build a ukulele?

A: This depends on your experience and chosen methods but you'll generally need hand tools (chisels, planes, sandpaper, etc.), power tools (bandsaw, jigsaw, router - optional), and specialized tools for fretting and finishing.

Q: How long does it take to build a ukulele?

A: It varies greatly based on experience and complexity. Expect to spend anywhere from a few weeks to several months, especially for beginners.

Q: Can I buy pre-cut kits?

A: Yes, many suppliers offer ukulele kits that include pre-cut parts. This simplifies the building process but still requires assembly and finishing.

Q: How much does it cost to build a ukulele?

A: The cost depends on the wood choices, tools owned, and the kit's complexity. Expect to invest a significant amount, but less than buying a high-quality professional ukulele.

Q: Where can I learn more about ukulele building?

A: Numerous online resources, books, and videos offer detailed instructions and tutorials on ukulele building. Look for reputable sources and learn from experienced luthiers.

Happy building, and may your ukulele sing beautifully!

Share:

Woodworking Guide to Creating a Wooden Valet Organizer

Building Your Own Wooden Valet Organizer: A Step-by-Step Guide

Hey there, fellow woodworkers! So, you’re thinking about building a valet organizer? Awesome! It’s a fantastic project â€" satisfying to build, incredibly useful, and a great way to show off your woodworking skills. This guide will walk you through the process, from initial design to the final sanding. Let’s get started!

Planning Your Perfect Valet

Before you even pick up a saw, you need a plan. Think about what you want your valet to do. Do you need a place for your watch, cufflinks, rings, and other jewelry? How about space for your phone, wallet, and keys? Maybe you want a dedicated spot for your glasses? Sketch out a few ideas, playing around with different compartment sizes and configurations. Consider the overall size â€" do you want something compact for a small bedside table or a larger piece for a dresser top?

Choosing Your Wood

The wood you choose is crucial to the overall look and feel of your valet. Hardwoods like walnut, cherry, or maple are beautiful choices and hold up well over time. If you're on a budget, consider pine or poplar â€" they're easier to work with and readily available. Think about the stain or finish you plan to use â€" this will influence your wood selection too. A lighter wood will show off a stain more vividly, while a darker wood might obscure it.

Designing Your Compartments

Now for the fun part â€" designing the compartments! Think about the items you want to store. For smaller items like cufflinks, you might create small, shallow compartments. For larger items like wallets or phones, you’ll need larger, deeper spaces. Consider adding dividers within compartments to keep things organized. Remember to leave enough space between compartments for easy access. A well-designed valet is both functional and visually appealing.

I often sketch out my ideas on paper first, then transfer them to a larger scale drawing. This helps visualize the final product and ensures all the pieces fit together perfectly. Don’t be afraid to experiment! You can even make a quick prototype from cardboard to test your design before committing to your chosen wood.

Cutting and Assembling Your Valet

Once you’ve finalized your design, it’s time to cut the wood. This is where precision is key! Use accurate measurements and sharp tools to avoid mistakes. A miter saw or table saw are ideal for making clean cuts. If you’re using a more intricate design, consider using a jigsaw for curves and detailed shapes.

Cutting the Pieces

Carefully cut all the pieces according to your design. Remember to account for the thickness of your wood when calculating the dimensions. It's always a good idea to cut your pieces a little bit oversized and then sand them down to the final size. This allows for any slight inaccuracies in your cuts. Label each piece clearly as you cut to avoid confusion later!

Joining the Pieces

There are several ways to join the pieces of your valet. Wood glue is essential for any woodworking project, providing a strong and lasting bond. You can also use dowels, biscuits, or pocket screws for extra strength and stability, particularly if you're dealing with larger pieces. Choose a method that suits your skill level and the complexity of your design.

Clamping and Drying

Once you’ve applied your glue and joined your pieces, it’s time to clamp them together. Use clamps to ensure a tight, even bond and leave them in place until the glue is completely dry. This usually takes several hours, or even overnight. Patience is key here - rushing this step could compromise the structural integrity of your valet.

Sanding and Finishing

Once your valet is fully assembled and the glue is dry, it’s time for sanding. Start with a coarser grit sandpaper (around 80 grit) to remove any rough edges or imperfections. Gradually move to finer grits (120, 180, and finally 220 grit) to achieve a smooth, even surface. Sanding is crucial for a professional-looking finish. Pay attention to corners and edges to avoid leaving any rough spots.

Applying the Finish

Now for the final touch: finishing your valet! You have plenty of choices here. Stain will enhance the natural beauty of the wood, while a clear finish (like polyurethane or varnish) will protect it from scratches and moisture. Apply the finish according to the manufacturer's instructions, using thin coats and allowing ample drying time between each coat. Consider using a sanding block between coats for a truly smooth, even finish. Multiple thin coats are always better than one thick coat.

Adding the Finishing Touches

And finally, the fun part! Add any extra touches that make your valet unique. Consider adding felt lining to the bottom of compartments to protect delicate items. You can also personalize it with engraved lettering or a custom logo. Let your creativity shine!

Commonly Asked Questions

  • Q: What type of wood is best for a valet? A: Hardwoods like walnut, cherry, or maple are ideal, but softer woods like pine or poplar work well too.
  • Q: What kind of glue should I use? A: Wood glue is essential, but for extra strength, consider using dowels, biscuits, or pocket screws.
  • Q: How long does the glue need to dry? A: Allow several hours or overnight for the glue to dry completely.
  • Q: How many coats of finish should I apply? A: Multiple thin coats are better than one thick coat. Follow the manufacturer's instructions for your chosen finish.
  • Q: Can I use a different type of joinery? A: Absolutely! Explore different joinery techniques based on your skill level and design complexity.
  • Q: What if I make a mistake? A: Don’t worry, everyone makes mistakes! Woodworking is a learning process. Start with a simpler design if you're a beginner.

There you have it! Building your own wooden valet organizer is a rewarding experience. Take your time, enjoy the process, and don't be afraid to experiment. Happy woodworking!

Share:

Rustic Wooden Chair Woodworking Plans

Rustic Wooden Chair Woodworking Plans: Build Your Own Comfort

Hey there, fellow woodworking enthusiasts! So you're looking to build a rustic wooden chair? Fantastic! There's something incredibly satisfying about crafting something beautiful and functional with your own two hands. This isn't just about following plans; it's about creating a piece that reflects your style and will last for years to come. Let's dive into this project together. I'll walk you through everything from selecting your lumber to the final finishing touches.

Choosing Your Lumber: The Foundation of Your Rustic Chair

The beauty of a rustic chair lies in the character of the wood. Forget perfectly smooth, blemish-free planks; we're aiming for something with a bit more personality. Knots, grain variations, and even some minor imperfections will add to the charm.

Types of Wood to Consider:

  • Reclaimed wood: This is the ultimate for that genuine rustic feel. Think old barn wood, salvaged pallets (make sure they're treated appropriately!), or even repurposed flooring. Each piece will tell a story!
  • Pine: A readily available and relatively inexpensive option, pine is easy to work with and readily accepts stains and finishes. It's a great choice for beginners.
  • Oak: For a more robust and durable chair, consider oak. It’s strong, beautiful, and can stand up to years of use. Just be prepared for a bit more work, as it's harder to cut than pine.
  • Cedar: If you're after a naturally fragrant and insect-repellent chair, cedar is an excellent choice. It's also naturally resistant to rot, making it suitable for outdoor use (with proper finishing, of course!).

Remember to inspect your lumber carefully before starting. Check for any significant cracks or warping that could compromise the structural integrity of your chair. You might need to select boards carefully to avoid these issues.

The Design: Simple Rustic Elegance

For this project, we'll focus on a simple, sturdy design. Think clean lines, minimal ornamentation, and a focus on the natural beauty of the wood. We’ll build a classic, four-legged chair with a slightly curved back. This design offers a good balance of ease of construction and stylish rustic aesthetic.

Essential Measurements:

I recommend sketching your design first. Accurate measurements are crucial. You'll need to determine the dimensions of the seat, legs, back supports, and any additional bracing you might want to include. Consider your own height and comfort level when choosing these dimensions. A comfortable seat height is typically between 17 and 19 inches.

Cutting and Shaping: Getting Your Hands Dirty

Now for the fun part! Once you've got your lumber, it's time to cut and shape the individual pieces according to your plan.

Tools You'll Need:

  • Measuring tape and pencil: Accuracy is key!
  • Circular saw or hand saw: For cutting the larger pieces of wood.
  • Jigsaw: For more intricate cuts, especially for shaping the back support.
  • Sandpaper (various grits): To smooth out the surfaces and edges.
  • Clamps: To hold pieces together while the glue dries.
  • Wood glue: A high-quality wood glue is essential for strong joints.
  • Screws or dowels (optional): For added strength and reinforcement.

Take your time and make precise cuts. Remember, you can always sand down a little more, but you can't add wood back! Use the appropriate safety gear â€" eye protection and dust masks are a must.

Assembly: Bringing It All Together

With all the pieces cut and sanded, it’s time to assemble your chair. This is where the planning and precision really pay off. Start by assembling the seat frame, ensuring all joints are tight and secure. Then attach the legs, making sure they're perfectly square to the seat. Finally, attach the back supports, making sure they’re comfortably angled.

Tips for Strong Joints:

  • Use plenty of glue: Don't skimp on the glue; it’s the backbone of your joints.
  • Clamp firmly: Make sure your clamps hold the pieces securely while the glue dries completely.
  • Consider dowels or screws: For added strength, you can use dowels or screws to reinforce the joints. Pre-drill pilot holes to prevent splitting the wood.

Let the glue dry completely before moving on to the next steps. This might take several hours, or even overnight, depending on the glue and the wood.

Finishing Touches: Adding the Finishing Flourish

The final step is to give your rustic chair a beautiful finish. Sand any remaining imperfections, and then consider your finishing options:

Finishing Options:

  • Natural finish: Let the natural beauty of the wood shine through with a clear varnish or sealant.
  • Stain: Use a wood stain to enhance the color and grain of the wood. Choose a color that complements your rustic aesthetic.
  • Paint: For a more modern rustic look, you could paint the chair. Consider a chalk paint or a distressed finish to keep that rustic charm.

Apply several thin coats, allowing each coat to dry completely before applying the next. This will ensure a smooth, durable finish that protects your chair from wear and tear.

Commonly Asked Questions

Q: Can I use power tools for this project?

A: Absolutely! Power tools can make the process much faster and easier. However, make sure you know how to use them safely and correctly.

Q: How long does it take to build this chair?

A: The time required will depend on your experience level and the tools you’re using. Expect to spend anywhere from a weekend to a week or more. Don’t rush the process; patience is key!

Q: What kind of wood is best for beginners?

A: Pine is a great choice for beginners. It’s relatively inexpensive, easy to work with, and readily available.

Q: What if my chair doesn't turn out perfectly?

A: Don’t worry! Even experienced woodworkers have projects that don’t go exactly as planned. The imperfections will add character to your unique piece! The key is learning from your mistakes and enjoying the process.

Q: Can I adjust the dimensions in the plans?

A: Absolutely! These are just guidelines. Feel free to adjust the dimensions to suit your needs and preferences.

There you have it! Building a rustic wooden chair is a rewarding experience. Don't be afraid to get creative and let your personality shine through in your design choices. Happy building!

Share:

How to Build a Simple Shaker Dresser: Easy PDF Plans

Building Your Own Shaker Dresser: A Simple Guide with Easy PDF Plans (Coming Soon!)

Hey there, fellow furniture enthusiasts! So you're dreaming of a beautiful, functional Shaker dresser, but the thought of tackling a project like that feels a bit daunting? Don't worry, you're not alone! Many people think building furniture is only for experienced carpenters, but I'm here to tell you it's absolutely achievable, even for beginners. This guide will walk you through building a simple, classic Shaker dresser, and while I can't provide a downloadable PDF *just yet* (it's in the works!), I'll give you all the information you need to get started.

Choosing Your Materials: The Foundation of Your Dresser

Before you even pick up a saw, let's talk materials. The beauty of a Shaker dresser lies in its clean lines and simple elegance, so we'll stick with straightforward, high-quality materials that enhance that aesthetic.

The Wood: Your Star Player

For this project, I recommend using a hardwood like pine, maple, or cherry. Pine is readily available and budget-friendly, making it a great option for beginners. Maple offers a lovely, light-colored finish and exceptional durability, while cherry provides richer tones and deepens in color over time. Consider your budget and personal preference when making your choice.

Hardware: The Finishing Touch

Shaker style is all about simplicity, so keep your hardware understated. Look for simple, brass or nickel knobs and pulls that complement your chosen wood. Avoid anything overly ornate or decorative â€" less is more!

Other Essentials: Don't Forget the Little Things!

Besides the wood and hardware, you'll need a few other essentials:

  • Wood glue
  • Wood screws (various lengths)
  • Sandpaper (various grits)
  • Wood filler
  • Paint or stain (optional, depending on your preferred finish)
  • Finishing supplies (e.g., polyurethane, brushes, rags)

Planning & Cutting: Laying the Groundwork

Once you've gathered your materials, it's time to get organized. While the downloadable PDF plans will make this easier, you can start by sketching out your dresser design. Don't worry about being a professional draftsman â€" a simple sketch with dimensions will suffice. This is a great time to decide on the overall size and the number of drawers you want.

Creating Your Cut List: Precise is Best

Based on your design sketch, create a detailed cut list. This list should specify the dimensions of each piece of wood, including the sides, top, bottom, drawer fronts, drawer sides, drawer backs, and dividers. Remember to account for the thickness of the wood when calculating dimensions. Double-check everything before you start cutting â€" accurate measurements are crucial!

Cutting the Wood: Safety First

Use a circular saw, miter saw, or table saw to cut the wood according to your cut list. Always prioritize safety when using power tools. Wear safety glasses and hearing protection, and make sure your work area is well-lit and free of clutter. Take your time and make accurate cuts to minimize errors.

Assembly: Bringing Your Dresser to Life

With all the pieces cut, the fun part begins â€" assembly! This is where your meticulous planning will pay off.

Building the Dresser Case: The Main Structure

Start by assembling the main structure of the dresser. This usually involves joining the sides, top, and bottom pieces. Use wood glue and screws to create strong, durable joints. Pay attention to squareness as you assemble the case â€" use clamps to keep everything aligned.

Creating the Drawers: Smooth Operation is Key

Next, construct the drawers. Shaker drawers are typically simple box constructions. Use rabbet joints or dadoes for added strength and a clean look. Make sure the drawers slide smoothly â€" a little wax or furniture glide can help.

Installing the Drawers: The Final Touches

Once the drawers are assembled, carefully install them into the dresser case. Double-check that they slide smoothly and that they are aligned properly. This is a good time to adjust anything that's not quite perfect.

Finishing: The Grand Reveal

With the dresser assembled, it's time to give it the finishing touch. Sand all surfaces smooth using progressively finer grits of sandpaper. Fill any holes or imperfections with wood filler, and sand again until smooth. Then, apply your chosen finish â€" whether it's paint, stain, or polyurethane â€" following the manufacturer's instructions.

Adding the Hardware: The Personal Touch

Finally, attach the hardware. This is a great opportunity to personalize your dresser. Choose knobs and pulls that complement your wood and overall style. Make sure they are securely attached and evenly spaced.

Commonly Asked Questions

Q: What kind of wood glue should I use?

A: A high-quality wood glue like Titebond is recommended. Follow the manufacturer’s instructions for application and drying time.

Q: How do I ensure my drawers slide smoothly?

A: Use furniture glides or apply a thin coat of wax to the drawer runners. Make sure the drawer sides are perfectly aligned and not rubbing against the dresser case.

Q: Can I use a different type of wood?

A: Yes, you can use other types of wood, but consider the wood's properties and workability. Harder woods require more skill and sharper tools. Softer woods might dent or scratch more easily.

Q: Where can I find the PDF plans?

A: The downloadable PDF plans are currently under development and will be available soon on [Insert Website/Link Here Once Available]. Check back regularly for updates!

Q: I'm a complete beginner. Is this project too difficult?

A: While it requires some effort and patience, this is a relatively straightforward project, even for beginners. Take your time, follow the instructions carefully, and don't be afraid to ask for help if needed. Building your own furniture is incredibly rewarding, and this project is a great place to start your journey!

I hope this guide has inspired you to take on the challenge of building your own Shaker dresser. Stay tuned for the release of the downloadable PDF plans! Happy building!

Share:

Woodworking youtube channel Closeout

a lot of Woodworking youtube channel will came across right As a consequence contemplating Woodworking youtube channel can be quite favorite in addition to most of us imagine numerous a long time to arrive The examples below is actually a minimal excerpt an essential subject regarding Woodworking youtube channel we hope you no doubt know the reason and below are some pictures from various sources

one photo Woodworking youtube channel


Make a laminated table top - The Architect's Table part

Make a laminated table top - The Architect's Table part

Adding breadboard ends to a table top- The Architect's

Adding breadboard ends to a table top- The Architect's

maxresdefault.jpg

Maxresdefault.jpg

woodworking projects and plans for beginners - YouTube

Woodworking projects and plans for beginners - YouTube

Share:

Search This Blog

Powered by Blogger.

Blog Archive

Recent Posts

Sample Text


Pages