Step-by-Step Woodworking Furniture Plans for Home Projects

Step-by-Step Woodworking Furniture Plans for Home Projects

This comprehensive guide provides detailed instructions and considerations for undertaking various woodworking furniture projects at home. It aims to equip the aspiring woodworker with the knowledge and confidence to tackle projects of increasing complexity, from simple shelving units to more intricate pieces. Emphasis is placed on precision, safety, and the application of sound woodworking techniques.

I. Project Planning and Preparation

A. Choosing Your Project

The selection of your first woodworking project is crucial. Beginners should opt for simpler designs with fewer complex joinery techniques. Consider the following factors:

  • Skill Level: Start with straightforward projects like a simple bookshelf or a small coffee table before venturing into intricate designs like chairs or cabinets.
  • Time Commitment: Realistic assessment of the time available is essential. Complex projects require significant time investment, potentially spanning several weeks or even months.
  • Tool Availability: Ensure you possess the necessary tools or have access to them. Renting specialized tools might be necessary for some projects.
  • Material Selection: Choose wood that is appropriate for your skill level and the project's intended use. Softwoods like pine are generally easier to work with for beginners, while hardwoods offer greater durability but require more experience.

B. Material Acquisition and Preparation

Once a project is selected, acquiring the necessary materials is the next critical step. This includes the wood itself, fasteners (screws, nails, dowels), adhesives (wood glue), and finishing materials (stain, varnish, paint).

  • Wood Selection: Carefully inspect the lumber for knots, cracks, and warping. Ensure the wood is properly seasoned to minimize shrinkage and warping later.
  • Quantity Calculation: Accurate calculation of wood quantity is vital to avoid material shortages or excessive waste. Detailed plans should provide material lists.
  • Wood Preparation: Before commencing construction, the wood should be planed, sanded, and treated if necessary (e.g., with a wood preservative for outdoor projects).

C. Tool Selection and Safety

Woodworking involves the use of potentially dangerous power tools. Safety should always be the paramount concern. Proper safety equipment, including eye protection, hearing protection, and dust masks, must be worn at all times.

  • Essential Tools: A basic woodworking toolkit includes a measuring tape, saw (hand saw or circular saw), chisel, hammer, screwdriver, sandpaper, and clamps.
  • Power Tool Safety: Familiarize yourself with the operation and safety features of any power tools before using them. Always unplug power tools before making adjustments or cleaning them.
  • Workshop Organization: Maintain a clean and organized workspace to prevent accidents. Keep tools stored properly and away from walkways.

II. Constructing Basic Furniture Pieces

A. Simple Bookshelf

A bookshelf is an excellent introductory project. The design can be customized to fit any space. This involves cutting the shelves and vertical supports to the desired dimensions, assembling them using pocket screws or dowels, and finally, finishing the piece with stain or varnish.

  • Cutting List: Prepare a detailed cutting list specifying the dimensions of each piece.
  • Joinery: Pocket hole joinery is a beginner-friendly method for connecting the shelves and uprights.
  • Assembly: Clamp the pieces together securely before driving in the screws.
  • Finishing: Sand the entire bookshelf smoothly before applying the chosen finish.

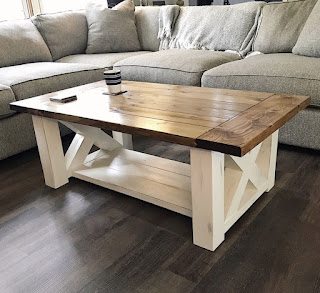
B. Basic Coffee Table

A simple coffee table typically consists of a tabletop and four legs. This project introduces the concept of creating a sturdy frame. The legs can be attached to the tabletop using various methods such as screws, dowels, or even mortise and tenon joints (for more advanced woodworkers).

  • Frame Construction: Construct a strong frame from the leg pieces. Ensure the frame is square and stable.
  • Tabletop Attachment: Attach the tabletop securely to the frame. Consider adding aprons for extra stability.
  • Finishing Touches: Sand the entire table thoroughly before applying the finish. Consider adding a protective layer of clear coat.

C. Simple Nightstand

A nightstand presents a slightly more challenging project, incorporating drawers. This involves building the basic box structure, creating the drawer boxes, and installing drawer slides. This project introduces the complexities of precise measurements and careful assembly.

  • Box Construction: Create the main structure of the nightstand using rabbet joints or dadoes for added strength.
  • Drawer Construction: Build the drawers using dovetail joints (for an advanced challenge) or simpler methods like rabbet joints and dadoes.
  • Drawer Slide Installation: Install drawer slides according to the manufacturer's instructions.
  • Finishing: Sand and finish the nightstand as with previous projects.

III. Advanced Techniques and Project Considerations

A. Advanced Joinery Techniques

As woodworking skills improve, incorporating more advanced joinery techniques enhances both the structural integrity and aesthetic appeal of the furniture.

  • Mortise and Tenon Joints: These strong and visually appealing joints require precision but offer exceptional strength.
  • Dovetail Joints: These interlocking joints are highly durable and aesthetically pleasing, often used in fine furniture.
  • Dado Joints: These joints are used for creating shelves or connecting components at right angles.

B. Wood Finishing Techniques

Choosing the right finishing technique is essential for protecting the wood and enhancing its appearance.

  • Staining: Staining adds color and depth to the wood's grain.
  • Varnishing: Varnishing provides a clear protective layer, highlighting the wood's natural beauty.
  • Painting: Painting offers a wide range of colors and provides a durable finish.

C. Project Design and Customization

Once fundamental techniques are mastered, the focus can shift towards designing and customizing furniture pieces to suit individual needs and preferences. This involves creating detailed plans, selecting appropriate materials, and applying learned techniques to realize the envisioned design.

Remember to always prioritize safety and accuracy in every step of the woodworking process. With patience, practice, and careful attention to detail, crafting beautiful and functional furniture pieces becomes a rewarding and fulfilling endeavor.

Share:

DIY Working Furniture Plans for Home and Office Spaces

Unlock Your Inner Craftsperson: DIY Furniture Plans for Home & Office

Tired of cookie-cutter furniture? Yearning for unique pieces that perfectly reflect your style and functionality needs? Then dive into the rewarding world of DIY furniture! This article provides detailed plans and inspiration to craft stunning, functional pieces for your home and office, saving you money and unleashing your creativity. Forget overpriced, mass-produced items; let's build something truly special, together.

Transform Your Home with DIY Magic

Building your own furniture offers unparalleled customization. Imagine a bookshelf perfectly tailored to your book collection, a coffee table crafted from reclaimed wood, or a sturdy, stylish desk designed to maximize your workspace efficiency. The possibilities are endless, limited only by your imagination (and maybe your tool collection!). This isn't about complex woodworking projects reserved for seasoned professionals; we'll focus on achievable plans, catering to various skill levels. Even beginners can achieve impressive results with careful planning and attention to detail. Prepare to feel a sense of accomplishment that mass-produced furniture simply can't match.

Simple & Stylish Bookshelves

Begin your DIY journey with a classic: a bookshelf. This project is perfect for beginners. Choose simple designs with straight lines and readily available materials like pine or plywood. You can easily find free plans online, offering step-by-step instructions and cut lists. Remember to carefully measure your space before starting. Pre-drill pilot holes to prevent wood splitting, and use wood glue and screws for strong joints. Sand thoroughly for a smooth finish and apply your chosen stain or paint for a personalized touch. Add a personal flair with decorative hardware or unique shelving arrangements.

A Coffee Table with Character

Next, let's tackle a coffee table. This project allows for more creative freedom. Consider using reclaimed wood for a rustic look, or opt for a modern design with sleek lines and metal legs. Research different joinery techniques, like mortise and tenon or dowel joints, to elevate your skills. Accurate cutting is crucial for a professional finish. Remember to seal the wood to protect it from spills and wear. You can personalize it further with inlaid designs, etched patterns, or a custom-made glass top.

Boost Your Office Productivity with Custom-Built Furniture

Moving into the office, customized furniture can dramatically improve your workspace. A well-designed desk improves ergonomics and efficiency. A filing cabinet built to your exact specifications ensures seamless organization. These projects might seem daunting, but by breaking them down into manageable steps, the process becomes surprisingly rewarding. Accurate measurements are even more critical here to guarantee functionality and comfort.

The Ultimate DIY Desk

Crafting your own desk allows you to incorporate features that boost productivity. Think about incorporating drawers for storage, a built-in cable management system, or a comfortable keyboard tray. Start by sketching your design, including detailed dimensions. This ensures you purchase the right materials and avoid costly mistakes. Opt for sturdy materials like hardwood or high-quality plywood for a durable and long-lasting desk. Consider adding ergonomic features like adjustable height mechanisms or a curved desktop for wrist support. Once complete, you'll have a workspace perfectly tailored to your needs.

A Filing Cabinet for Supreme Organization

Finally, tackle the filing cabinet. This project requires careful planning for drawers that smoothly glide and a robust structure to handle the weight of files. Use durable plywood or melamine for the cabinet body and consider using metal drawer slides for easy operation. Precise cuts are essential to ensure proper drawer alignment and function. Don't forget to apply a protective finish to the cabinet to withstand daily wear and tear. Once completed, you'll marvel at the efficiency and style this custom piece brings to your office.

Remember, DIY furniture making is a journey of learning and creativity. Embrace the process, don't be afraid to experiment, and enjoy the satisfaction of crafting beautiful, functional pieces for your home and office. The rewards—both functional and personal—are immense.

Share:

DIY Coffee Table Plans for Modern and Rustic Styles

DIY Coffee Table Plans: Modern & Rustic Designs

Transform your living space with a handcrafted coffee table! This guide provides detailed plans for building both modern and rustic styles, empowering you to create a unique piece perfectly suited to your home. Forget expensive store-bought furniture; unleash your inner craftsman and build something truly special. We'll walk you through each step, from material selection to final finishing touches, ensuring a rewarding DIY experience.

Modern Coffee Table: Sleek & Minimalist

This design emphasizes clean lines and a minimalist aesthetic. Its simple construction makes it a perfect project for beginner DIYers. We'll be using a combination of sturdy wood and metal legs for a sophisticated look. Prepare to be amazed at how easily you can achieve a high-end design on a budget!

Materials You'll Need:

  • One large piece of plywood (e.g., birch or maple) – choose a thickness of at least ¾ inch for stability.
  • Four metal hairpin legs (adjust height according to your preference).
  • Wood screws (appropriate size for your plywood and legs).
  • Wood glue.
  • Sandpaper (various grits).
  • Wood stain or paint (optional).
  • Polyurethane sealant (optional).

Construction Steps:

  1. Cut the plywood: Measure and cut the plywood to your desired dimensions using a circular saw or jigsaw. Ensure precise cuts for a clean, professional finish.
  2. Sand the edges: Smooth all edges of the plywood using sandpaper, starting with coarser grits and progressing to finer ones for a perfectly smooth surface. This step is crucial for a professional look and feel.
  3. Apply finish (optional): Stain or paint the plywood according to your preference. Allow ample drying time before proceeding.
  4. Attach the legs: Position the metal legs at the corners of the plywood. Pre-drill pilot holes to prevent splitting the wood. Secure them with wood screws and glue for extra strength and stability.
  5. Seal (optional): Apply a coat of polyurethane sealant to protect the wood and enhance its durability. Allow it to dry completely before use.

Rustic Coffee Table: Warm & Inviting

Embrace the charm of rustic design with this coffee table crafted from reclaimed wood. The natural imperfections of the wood will add character and warmth to your living room. This project is a fantastic opportunity to repurpose old wood, giving it a new lease on life and creating a truly unique statement piece.

Materials You'll Need:

  • Reclaimed wood planks (various lengths and widths, ensure they're sturdy).
  • Wood screws.
  • Wood glue.
  • Wood filler.
  • Sandpaper (various grits).
  • Wood stain or clear sealant.
  • Optional: Casters for easy movement.

Construction Steps:

  1. Prepare the wood: Clean and inspect the reclaimed wood planks. Fill any gaps or cracks with wood filler and allow it to dry completely.
  2. Assemble the tabletop: Arrange the planks to create your desired tabletop shape and size. Secure them together using wood glue and screws. Pre-drilling pilot holes is recommended.
  3. Sand the surface: Smooth the tabletop using sandpaper, paying attention to any uneven surfaces or rough edges. This will ensure a comfortable and aesthetically pleasing finish.
  4. Apply finish: Apply a wood stain or a clear sealant to protect the wood and enhance its natural beauty. Let it dry thoroughly.
  5. Add legs (optional): Attach sturdy legs or use casters for mobility. Consider using reclaimed wood for legs to maintain the rustic theme.

Building your own coffee table is a rewarding and cost-effective way to personalize your home. Choose the style that best suits your taste and get started on your DIY adventure! Remember to prioritize safety and always use appropriate safety gear when working with power tools.

Share:

Step-by-Step Furniture Design Plans for Every Room

Step-by-Step Furniture Design Plans for Every Room

Dreaming of crafting bespoke furniture that perfectly complements your home's style? This guide provides detailed, step-by-step plans to design and build furniture for every room, empowering you to transform your living spaces. Forget generic, mass-produced pieces – let's create furniture that reflects your unique personality and needs.

Designing for the Living Room: Comfort and Style

The living room, the heart of the home, deserves furniture that invites relaxation and conversation. We'll focus on designing a comfortable sofa and a stylish coffee table. Begin by sketching your desired sofa dimensions. Consider the available space, desired seating capacity, and the overall style of your living room. Detailed measurements are crucial here; accurate dimensions prevent costly mistakes later.

Designing the Sofa

Choose your materials carefully. Will it be upholstered in luxurious velvet, durable linen, or something more rustic? Select the wood for the frame—oak for a classic look, pine for affordability. We'll explore different joinery techniques, including mortise and tenon joints for superior strength and a clean aesthetic. Once you finalize your design, create detailed drawings, including precise dimensions for each piece of the frame and the cushion components.

Designing the Coffee Table

The coffee table complements the sofa, acting as a central focal point. Consider its size and height relative to the sofa for optimal ergonomics. Explore different designs – a simple square table, an elegant oval, or a unique geometric shape. Select your materials – solid wood, reclaimed wood, or even a sleek metal and glass combination. For a unique touch, you might incorporate inlaid wood or a decorative tile top. Detailed plans for cutting, assembling, and finishing the table will ensure a professional outcome.

Transforming the Bedroom: Restful Retreats

Your bedroom should be a sanctuary of peace and tranquility. We will guide you in designing a sturdy and stylish bed frame and a functional bedside table. First, decide on the style of your bed – a minimalist platform bed, a classic four-poster, or a more modern design. Consider factors like the mattress size and desired height.

Crafting the Bed Frame

The bed frame is the cornerstone of the bedroom. Begin by sketching the frame, paying close attention to the dimensions and the desired style. Select your lumber carefully, considering strength and aesthetic appeal. For a rustic look, choose reclaimed wood; for a more modern aesthetic, opt for sleek, contemporary materials like plywood or engineered wood. Detailed step-by-step instructions will cover cutting, assembling, and finishing the frame, ensuring it's both beautiful and durable.

Building the Bedside Table

A bedside table provides convenient storage and a surface for a lamp or books. Its design should complement the bed frame. We'll consider various styles, from a simple nightstand to a more elaborate design with drawers and shelves. Choose suitable wood and hardware, ensuring functionality and aesthetics align perfectly. The building process will involve precise cutting, assembling using appropriate joinery techniques, and applying a protective finish.

Dining in Style: Designing for the Dining Room

The dining room is a space for gathering and celebrating. We'll guide you through designing a solid dining table and comfortable chairs. Start by determining the ideal size of your dining table based on the number of people you regularly entertain. Consider both the table's length and width, ensuring ample space for each diner.

Constructing the Dining Table

The dining table is the centerpiece of the room. Explore different styles, including a classic rectangular table, a round table for intimate gatherings, or a more unique design. Choose durable materials – solid hardwood for longevity and a sophisticated look, or a more contemporary material like metal or glass. The detailed plans will cover all aspects of construction, from cutting and assembling the tabletop and legs to applying a protective finish.

Creating Comfortable Dining Chairs

Comfortable dining chairs are just as essential as the table itself. Consider ergonomics and design aesthetics when choosing the chair's dimensions and style. Select strong, comfortable materials, ensuring they complement the dining table. The construction process will involve detailed steps for building the chair frame, adding cushioning, and upholstering for optimal comfort.

By following these detailed step-by-step plans, you can confidently embark on your furniture-making journey, creating pieces that reflect your personal style and enhance the beauty of your home. Remember, precision and patience are key to success. Happy crafting!

Share:

Aquarium Furniture Plans for Creative and Functional Tank Designs

Aquarium Furniture Plans for Creative and Functional Tank Designs

Designing the perfect aquarium setup goes beyond just choosing the right fish and plants. The furniture surrounding your tank significantly impacts the overall aesthetic and functionality of your aquatic ecosystem. Clever furniture plans can transform your aquarium from a simple feature into a stunning centerpiece, seamlessly integrating it into your home's décor. This article explores various creative and functional furniture designs, offering inspiration and practical advice to help you build the aquarium of your dreams.

Integrating Your Aquarium into Your Living Space

The placement of your aquarium is crucial. Don't simply stick it in a corner; consider its surroundings. A well-designed stand and surrounding furniture can elevate the aquarium's visual impact. Imagine a built-in unit that houses not only the tank but also additional storage for equipment, fish food, and cleaning supplies. This creates a clean, organized look, minimizing clutter and maximizing space. Alternatively, consider a free-standing unit crafted from contrasting materials – a sleek, modern tank resting on a rustic wooden stand, for instance, can create a striking visual juxtaposition.

Choosing the Right Materials

Material selection is critical for both aesthetics and practicality. Moisture resistance is paramount. Avoid using materials prone to warping or damage from water spills. Hardwoods like oak or mahogany provide both durability and an elegant finish. Alternatively, consider treated plywood or MDF (medium-density fiberboard) for a more budget-friendly option. Remember to seal any exposed wood with a high-quality waterproof sealant to protect it from potential damage.

Creative Aquarium Stand Designs

The aquarium stand is more than just a support structure; it's a key design element. Forget the standard, boring stand; let's explore some creative options. A custom-built stand allows you to tailor the design to your specific needs and preferences. This could involve incorporating features like:

  • Built-in lighting for a dramatic effect.
  • Hidden compartments for equipment and supplies.
  • Open shelving to display aquatic-themed décor.
  • Integrated filtration systems for a cleaner, sleeker setup.

Consider the overall style of your room when choosing a design. A minimalist, modern tank might look best on a sleek, metal stand, while a larger, planted tank might be better suited to a more substantial wooden stand.

Beyond the Stand: Integrated Furniture

Push the boundaries of aquarium design by integrating your tank into larger furniture pieces. A stunning custom-built entertainment center incorporating a built-in aquarium creates a truly unique focal point. This can seamlessly merge the aquarium with other living room elements, such as a TV stand or bookshelf, creating a cohesive and integrated design. Imagine a wall unit with a central aquarium flanked by bookshelves, creating a beautiful, aquatic-themed library. The possibilities are endless.

Practical Considerations and Planning

Before you start building, meticulously plan your project. Calculate the weight of your full tank, including water, substrate, and equipment. This weight needs to be evenly distributed, ensuring the stand is strong enough to handle the load. Consider also the accessibility of the equipment and the ease of maintenance. Plan for adequate space for filter maintenance, water changes, and any other regular tasks. Accurate measurements are crucial to ensure a perfect fit for your tank and its surroundings.

Building your own aquarium furniture offers unparalleled customization and allows you to create a truly unique and functional space. By carefully considering materials, design, and practicality, you can transform your aquarium from a simple addition to a captivating centerpiece within your home.

Share:

Asian Furniture Plans for Elegant and Space-Saving Designs

Asian Furniture Plans for Elegant and Space-Saving Designs

Asian design principles emphasize minimalism, functionality, and natural materials, creating furniture that's both aesthetically pleasing and practical. This approach is particularly valuable in modern living where space is often at a premium. This article explores detailed plans for crafting elegant and space-saving Asian-inspired furniture pieces, guiding you through the design process and offering practical tips for successful execution.

Creating a Low-Profile Coffee Table

A low coffee table is a staple in Asian-inspired interiors. Its low height encourages a relaxed seating posture, and its simple design complements diverse décor styles. This plan focuses on a minimalist design using solid wood and clean lines.

Materials and Tools:

You will need:

  • Solid wood planks (e.g., teak, oak, or bamboo) – approximately 1.5 inches thick, width determined by your desired table dimensions.
  • Wood glue
  • Wood screws
  • Sandpaper (various grits)
  • Wood stain or finish of your choice
  • Measuring tape
  • Saw (circular saw or hand saw)
  • Drill
  • Clamps

Construction Steps:

Begin by cutting the wood planks to your desired dimensions for the table top and legs. Assemble the tabletop by joining the planks edge-to-edge using wood glue and screws. Ensure the joints are tight and flush. For the legs, use sturdy, straight pieces of wood. Attach the legs to the tabletop using screws, ensuring even spacing and stability. Sand the entire piece thoroughly to create a smooth surface. Finish with your chosen wood stain or finish, allowing adequate drying time between coats.

Building a Multifunctional Storage Bench

Space-saving furniture often incorporates clever storage solutions. This plan details a sleek storage bench, perfect for hallways, entryways, or bedrooms. Its clean lines and understated elegance seamlessly integrate into various interior styles.

Materials and Tools:

Gather the following:

  • Wooden planks for the frame and seat (consider using lighter woods like pine or birch for ease of construction)
  • Plywood for the storage compartment base
  • Hinges
  • Wood glue
  • Wood screws
  • Sandpaper
  • Wood stain or paint
  • Measuring tape
  • Saw
  • Drill
  • Clamps

Construction Steps:

Construct a sturdy rectangular frame from the wooden planks. Cut and attach the plywood base to form the storage compartment. Create a hinged lid from additional wooden planks to cover the storage area. Attach the hinges securely to both the lid and the frame. Ensure the lid fits snugly. Finally, attach the seat to the top of the frame. Sand the entire bench smooth and apply your chosen finish.

Incorporating Natural Materials and Minimalist Aesthetics

Natural materials like bamboo, rattan, and reclaimed wood are central to Asian design. These materials bring warmth and texture to the space. Minimalist aesthetics, characterized by clean lines, uncluttered surfaces, and a focus on functionality, further enhance the space-saving aspect. When selecting materials and designing your pieces, prioritize simple shapes and avoid unnecessary ornamentation. Remember to choose finishes that complement the natural beauty of the chosen wood, maintaining a sense of understated elegance.

By following these plans and embracing the principles of Asian design, you can craft elegant and space-saving furniture that enhances the beauty and functionality of your home. Remember to always prioritize safety and precision when working with tools and materials.

Share:

Heavy-Duty Workbench Woodworking Plans for DIY Projects

Build Your Own Indestructible Workbench: Detailed Plans for DIY Enthusiasts

Tired of flimsy workbenches that wobble and creak under pressure? Yearning for a robust, reliable workspace that can withstand the rigors of your most demanding woodworking projects? Then prepare to unleash your inner craftsman and build a heavy-duty workbench that will stand the test of time. This comprehensive guide provides detailed plans, empowering you to create a personalized workspace tailored to your specific needs and exceeding your expectations.

Planning Your Heavy-Duty Workbench

Before you grab your tools, careful planning ensures a successful build. Consider these key factors: size and dimensions – measure your available space and determine the ideal workbench size for your projects. material selection – hardwoods like maple or oak offer exceptional durability, while less expensive options like pine require careful construction techniques. Finally, intended use heavily influences your design choices. A workbench for intricate carving requires different features than one designed for heavy-duty joinery. Sketch your design, noting specific dimensions and material quantities. This preliminary step saves time and frustration down the line.

Choosing the Right Wood

The choice of wood significantly impacts your workbench's longevity and performance. Hardwoods like maple and oak provide unmatched strength and resistance to wear and tear. Their dense grain resists dents and scratches, ensuring your workbench remains a reliable workhorse for years to come. Softer woods like pine are more affordable, but require more robust construction techniques and careful consideration of potential wear points. For added durability, consider using hardwood for the top and legs, and a softer wood for the internal supports.

Essential Tools and Materials

Gather your tools and materials before starting. This ensures a smooth and efficient building process. You'll need:

  • Measuring tape and square
  • Circular saw or table saw
  • Drill and various drill bits
  • Screwdriver or impact driver
  • Clamps (various sizes)
  • Wood glue
  • Wood screws (various lengths)
  • Your chosen wood (consider thickness and dimensions)
  • Optional: Hardware for a vise, drawers, or other features.
Remember to always prioritize safety and use appropriate personal protective equipment (PPE), including safety glasses and hearing protection.

Constructing the Workbench Frame

The foundation of your workbench is its frame. Begin by cutting your lumber to the exact dimensions outlined in your plan. Precise cuts are crucial for a sturdy and level workbench. Assemble the frame using wood glue and screws for a strong, rigid connection. Reinforce the corners with additional screws and consider using pocket hole joinery for added strength and a clean look. Once the frame is assembled, carefully check for squareness and make any necessary adjustments before proceeding.

Adding Strength and Stability

To further enhance the workbench's robustness, incorporate bracing. Diagonal braces significantly increase the frame's resistance to racking and twisting. Carefully plan the placement of these braces to ensure optimal support. Consider adding vertical supports for increased stability, especially if you plan on mounting a heavy vise or using the workbench for power tool operation. The added strength will pay off in years of reliable performance.

Attaching the Workbench Top

The workbench top is where the magic happens! Ensure your chosen top material is properly dimensioned and planed to ensure a flat, even surface. For ultimate durability, consider using a thicker top than the standard. Attach the top to the frame using countersunk screws and wood glue. Pre-drill pilot holes to prevent splitting the wood. For heavy-duty applications, consider using robust fasteners like carriage bolts, which provide exceptional strength and allow for easy removal or adjustment if needed. Once the top is secure, sand it smooth for a professional finish.

Finishing Touches and Personalization

After the main structure is complete, personalize your workbench! Adding a vise provides invaluable clamping power. Consider incorporating drawers for tool storage and organization. Apply a protective finish like polyurethane to safeguard your workbench from moisture and wear. This step not only enhances the workbench's appearance but extends its lifespan significantly. Your personalized workbench is now ready for years of reliable service.

Building a heavy-duty workbench is a rewarding experience. With careful planning, precision cutting, and robust construction, you'll create a workspace that stands up to the demands of any project. So, gather your tools, follow these plans, and enjoy the pride of crafting a workbench truly built to last!

Share:

Search This Blog

Powered by Blogger.

Blog Archive

Recent Posts

Sample Text


Pages